I must confess. I have typically abided by the theory that there are two types of people in this world. The ones that DIY, and the ones that buy the things that DIYers make. I tend to be among the later. (I don't know what I did before Etsy). Well thanks to Martha Stewart Decoupage and Plaid Crafts (the sponsors of this post) I may be a convert. Who wouldn't when a whole box of Martha Stewart Craft Supplies show up at your front door. There was glow in the dark and glitter decoupage in there people! As a result I have completely taken over our dining room for better than a week. I just can't stop myself. I have had so much fun working on these projects and absolutely could not wait to share them with you!
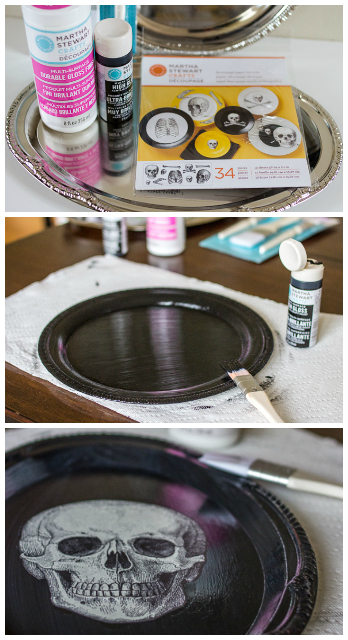
First we'll tackle the trays. I think they are my favorite. They were so easy! I took this assignment as an excuse to go scour the dollar store and found these "silver" serving trays. However, if you have any old serving trays kicking around at home that need a makeover you could certainly use those. 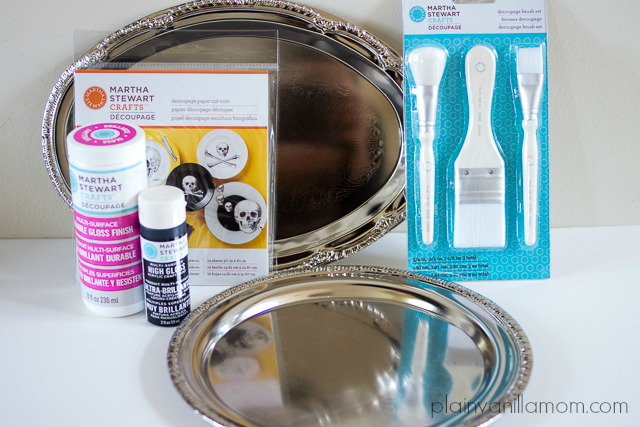 Here's what you will need:
- Some sort of plate or serving tray/platter
- Martha Stewart Decoupage Papers - I actually saw these decoupage papers in our Michaels at the end of the summer and was thinking about buying some when the opportunity to be part of this campaign came along. It couldn't have been more perfect timing. I received the skulls but there are many options to choose from.
- Martha Stewart Crafts High Gloss Black Acrylic Craft Paint
- Martha Stewart Crafts Decoupage Durable High Gloss Finish
- Martha Stewart Crafts Decoupage brushes.
To begin, prep your trays by giving them a good wash with warm soap & water . Make sure they are thoroughly dry and then paint them with the black paint. I used two coats of paint letting them dry about an hour in between coats. 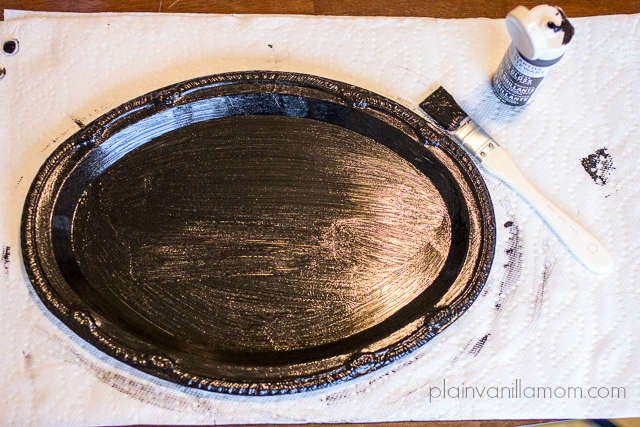 Once the paint is dry, coat the entire tray with Martha Stewart Crafts Decoupage in High Gloss Finish. Immediately put a thin layer of the decoupage on the back of your chosen decoupage papers and adhere them to the tray. Let it dry for another hour or so and then apply another thin layer of decoupage over the design. If you are planning on using the trays for more than just decoration I would add another coat or two of decoupage to make it a little more durable. All the Martha Stewart Decoupage formulas are dishwasher safe. If you are planning on washing your piece in the dishwasher you will definitely want more than one coat. That said, I'm not sure I would throw these dollar store trays in the dishwasher but hey... that's just me.
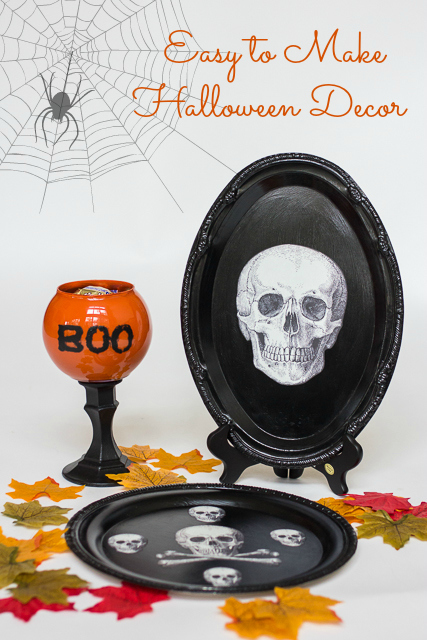
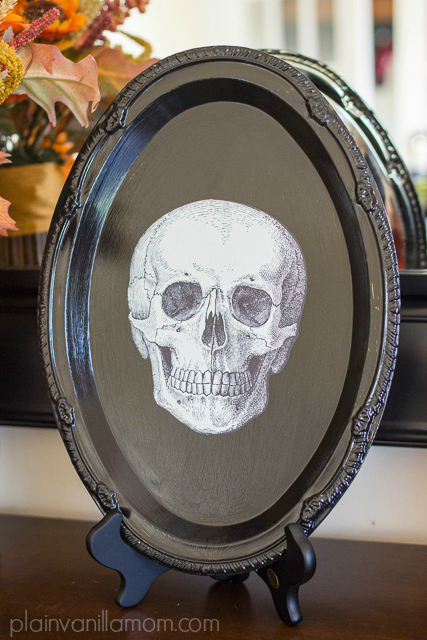
Seriously, how cool does this look? I am not lying when I say these were super quick and easy, and they made a huge difference in the Halloween display I have on the hutch in our dining room. I almost wish I had made more. I'm loving them as decorations but I would totally put treats on these for a Halloween party.
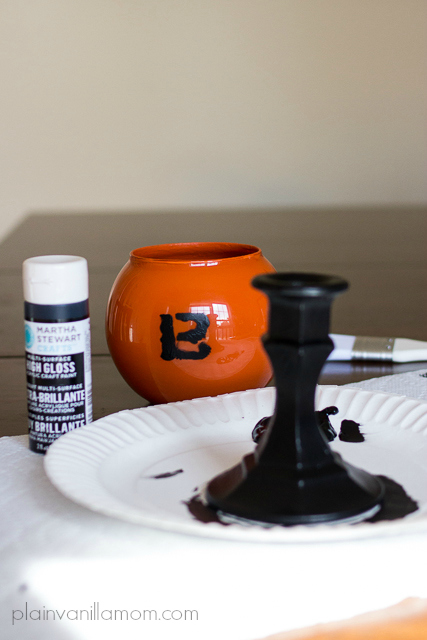
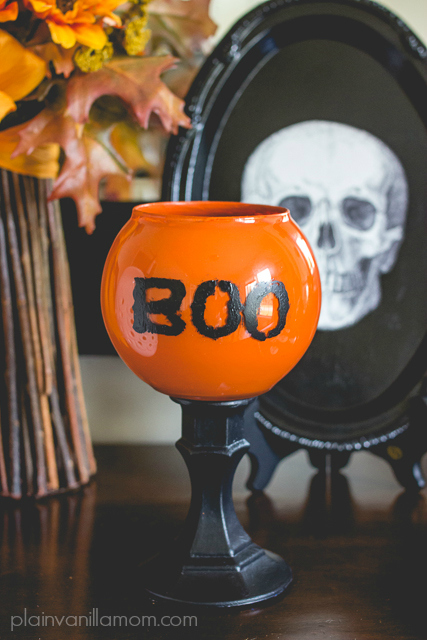
Ok, now that you have the hang of it here's a quick treat bowl you can whip up to pair with your serving trays. The glass bowl/vase and candlestick holder both came from the dollar store as well. For this you will need the bowl and candlestick holder as well as Martha Stewart Multi Surface Acrylic Craft Paints in Black and Adobo, and Martha Stewart Crafts Multi Surface Decoupage in Durable Matte Finish. 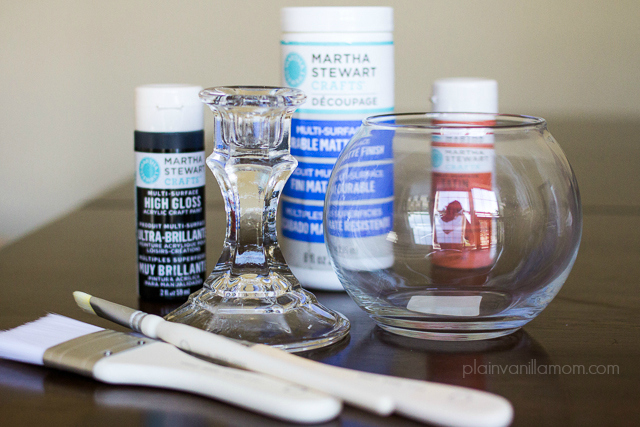 You know the drill. Wash and dry your surfaces well. Paint the candlestick holder black. I used two coats and I wasn't very neat because I wanted it to have an aged sort of spooky feel. I didn't worry about smooth application for this piece. When that was dry I applied a coat of the Durable Matte Finish Decoupage to give it a more muted look. I painted the vase (using the Adobo color) on the inside because I thought it looked a little cleaner on the outside that way, plus I knew I was going to want to stencil something onto it in the end. I used two coats of color plus a little touch up work where ever I could still see light getting through. To the paint finish more durable, after it dries, apply a layer of decoupage to the inside. When all that was done I stenciled the word "BOO" on the front. This would look equally adorable with a jack-o-lantern face on it too. I had a hard time deciding! Finally, hot glue the bowl onto the candlestick holder. Viola! Candy dish. Oh yea... the most important step. Fill treat bowl with candy, preferably chocolate.
So what do you think? I am loving my new additions and I think the DIY bug has officially bitten. In fact, there are even more projects from this go-round but I just couldn't fit them all in this post. There's a (very) good chance you will be seeing more of this kind of thing on the blog from now on. After a few evenings camped out in our dining room I am a firm believer that crafting is good for the soul ;) Crafting, and maybe a little red wine. 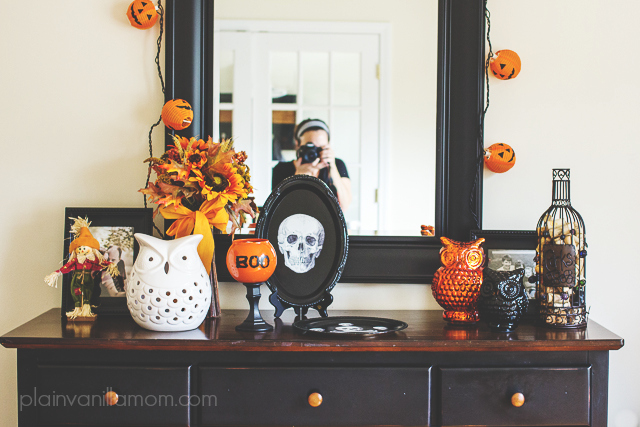 Thanks again to Martha Stewart Craft Supplies and Plaid Crafts for sponsoring today's post. All ideas and opinions are 100 % my own. If you are in need of a little more inspiration you can find more ideas from fellow crafters on Plaid's Facebook Page as well as follow them on Pinterest.