• Home
  • play
    • sensory play
    • arts & crafts
    • water play
    • baby
    • toddler
    • big kids
    • weekly playlist
  • learn
    • colors
    • numbers
    • sensory
    • my first sensory bins
  • Photography
  • Celebrate
    • spring
    • summer
    • Valentine’s Day
    • St. Patrick’s Day
    • Easter
    • Mother’s Day
    • Father’s Day
    • Halloween
    • Thanksgiving
    • Christmas
  • family
    • parenting
    • places to go
    • recipes
    • Email
    • Facebook
    • Instagram
    • Pinterest
    • Twitter

Plain Vanilla Mom

DIY Wooden Ring Ribbon Teether

in baby play, diy on 05/07/13

Well Little E is finally making his first “official” appearance on the blog helping me show off my latest project.

When I made this ribbon teether for Little E. I actually started with the plan to make this red white and blue for the 4th of July (which would have looked equally cool). However, when I got to Michaels I found a fantastic selection of black and white ribbon in the dollar bins and knew exactly how to put it to good use. Babies love high contrast and E really enjoys all the black white rattles and flashcard toys that we have for him so I thought using the black and white ribbon would be perfect for this. I was right. He loves playing with this thing!

Even if you are DIY challenged (…like me) can handle this one. You just need a wooden ring and some ribbon. In fact the hardest part might just be finding a wood ring. Check your local craft stores and if all else fails you can find them online.

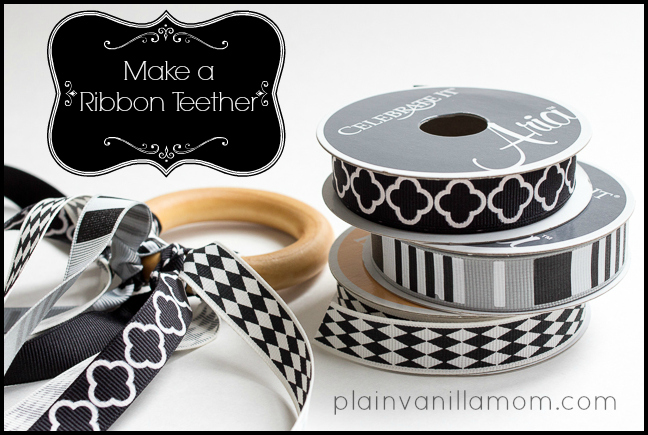
To actually make the toy all you need to do is cut strands of ribbon to your desired length. Then, tie then onto the wooden ring using a double knot. I did use a little beeswax to seal the wood.

And here’s Little E to demonstrate how to play with it….

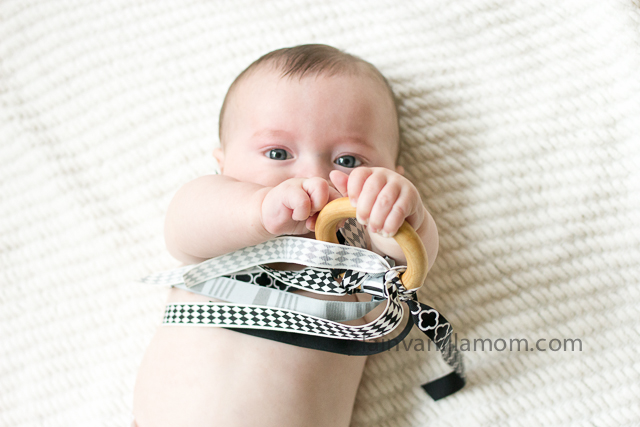
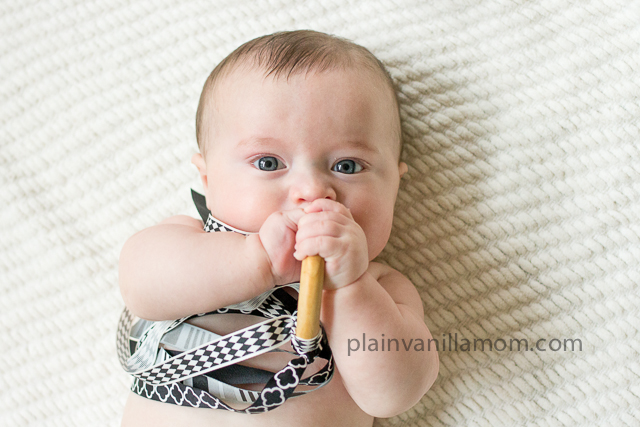
See! Lots of baby fun! My only notes on this project…. On one of the ribbon styles, the white design is actually some kind of appliqué, and as the little guy chews on it I’ve noticed it starting to peel off so I actually ended up swapping out that ribbon for another style in the end. Just make sure whatever you pick up is baby friendly. Also for a babe this age I wouldn’t make the ribbon too long as you don’t want them to be able to get tangled up in it. These might be just a tad too long but I’m always with him when he’s using it so I’m ok with it for now. In case your wondering… E is 5 months here.

Are you Following us on Facebook and Twitter? I’d love to have you. We are on Pinterest and Instagram too. Hope to see you there!


Share this postShare on Facebook
Facebook
Pin on Pinterest
Pinterest
Tweet about this on Twitter
Twitter
Share on Google+
Google+
Email this to someone
email
Share on StumbleUpon
StumbleUpon

Related posts:

Sensory Bag for Baby

12 Comments

« Date Night {Sponsored by Cascade #MyPlatinum}
An Invitation to Race »

Comments

  1. Megan says

    November 18, 2013 at 5:08 pm

    I love this! Curious – when you did the beeswax seal this makes it safe for the infant? I wasn’t sure if there’s a specific type of wood I need to find but that note makes it seems like as long as it’s sealed it should be okay?

    Reply
    • Jennifer Haas says

      November 22, 2013 at 12:49 pm

      I’m not sure if the seal made much difference. As he’s chewed on it it seems like it needs to be sealed again anyway. If you do seal it I would definitely use something all natural and not a chemical since it’s apt to end up in little mouths. I also made sure the wood was smooth with no splinters or anything.

      Reply
  2. Christina says

    January 26, 2014 at 6:39 pm

    I really like your blog. I just wanted you to know that there is a grammatical error in your little bio on top. It should say “come” together instead of “coming”. Thanks for the fun ideas for DIY baby things.

    Reply
    • Jennifer Haas says

      January 27, 2014 at 12:55 pm

      Glad you like the blog and thank you! Do you know how many times I’ve looked at that image and never noticed that error. Thanks again!

      Reply
  3. Jana says

    May 21, 2014 at 8:12 am

    Just came across you blog and I cant seem to leave. I have lots of things to do today, but this is awesome. and I am stuck here. Just want to drop a line and say HI! You have a very interesting blog. Thanks!
    Jana

    Reply
    • Jennifer Haas says

      May 21, 2014 at 8:27 am

      Haha, thanks Jana! So glad you are here visiting 🙂 If you do manage to get away I hope you come back often!

      Reply
  4. Susan says

    October 8, 2014 at 10:29 pm

    What size is the ring? I was looking online and at our local stores. The only size I found were 2″. Yours looks bigger!! Love this idea!!!

    Reply
    • Jennifer Haas says

      October 29, 2014 at 10:18 pm

      This was a 3″ ring if memory serves. I was able to find them online. Try amazon, etsy or I ordered from crafparts.com

      Reply
  5. Jamie clark says

    October 22, 2014 at 1:15 pm

    So how do you put the beeswax on. Did you melt it and then dip the wood in it?

    Reply
    • Jennifer Haas says

      October 29, 2014 at 10:15 pm

      Hi Jamie! I just use my fingers and rub it into the wood. Makes your hands nice and soft too 🙂

      Reply
  6. Deb says

    August 8, 2015 at 12:51 pm

    Hi. You have a wonderful graphic sensibility! I’m wondering how you keep the ribbon from fraying at the ends? Is it grosgrain? Because I know satin ribbon will fray. I was thinking of maybe slightly burning the ends since my little one prefers satin ribbon. Thanks for the idea!

    Reply
    • Jennifer Haas says

      September 8, 2015 at 8:52 pm

      I honestly didn’t do anything to it. They didn’t end up fraying all that much so I just trimmed them off and on as necessary. I can see where they might though. Burning the ends might help that.

      Reply

Leave a Reply Cancel reply

Your email address will not be published. Required fields are marked *

CommentLuv badgeShow more posts

Hi There!

Welcome! I'm Jen, just your average well caffeinated, camera wielding, multitasking, plain vanilla mom to three boys. I love photography & am addicted to Instagram (oh & Starbucks). So, grab a cup of coffee and take a minute to peruse the pages here. I look forward to getting to know you better! Read More…

  • Email
  • Facebook
  • Instagram
  • Pinterest
  • Twitter

Instagram

Load More...
Follow on Instagram

Popular Posts

  • Bug Fossils | A Play Dough Invitation
  • Dyed Wooden Eggs
  • Flower Garden Sensory Bin
  • Sensory Bag for Baby
  • Glitter Water Blob Sensory Bags for Fun & Learning
  • Dot Marker Butterflies
  • Facebook
  • Instagram
  • Pinterest
  • Twitter

Copyright © 2023 · glam theme by Restored 316

  • Disclosure/Copyright
This website uses cookies to improve your experience. We'll assume you're ok with this, but you can opt-out if you wish.Accept Read More
Privacy & Cookies Policy